Salt Chlorinator Installation Guide (SALTLOGIC System – South Africa)
Installing a salt chlorinator might sound technical—but with the right setup, it’s a straightforward process.
We’ve helped many pool owners across South Africa install their SALTLOGIC systems correctly, and one thing stands out:
👉 A properly installed chlorinator performs better, lasts longer, and requires less maintenance
This guide walks you through how to install your SALTLOGIC salt chlorinator step by step, so you get the best results from day one
BEFORE YOU START (IMPORTANT)
Before installing your system, make sure:
- Your pool pump and filtration system are working correctly
- All plumbing connections are secure
- Your pool water is balanced
👉 Installation is only effective if the system is set up on a stable foundation
WHAT YOU’LL NEED
- SALTLOGIC chlorinator unit
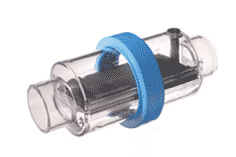
- Cell housing and fittings
- Plumbing connections (PVC pipes, unions)
- Power supply connection
👉 Ensure all components are available before starting
STEP-BY-STEP INSTALLATION GUIDE
Step 1: Position the Chlorinator Cell
Install the chlorinator cell after the filter and pump in your plumbing line.
👉 This ensures clean, filtered water flows through the system.
🔧 Step 2: Install the Cell Housing
Secure the housing into the pipe system using proper fittings.
Make sure:
- Water flow direction matches the arrow on the unit
- All connections are tight and leak-free
🔧 Step 3: Mount the Control Unit
Install the control unit in a dry, well-ventilated area, close to the pump system.
Avoid:
- Direct sunlight
- Water exposure
🔧 Step 4: Electrical Connection
Connect the chlorinator to your power supply according to specifications.
👉 If unsure, use a qualified electrician to ensure safe installation.
🔧 Step 5: Add Salt to the Pool
Add the correct amount of salt based on your pool volume.
👉 Refer to your SALTLOGIC specifications for exact levels
Allow the salt to dissolve fully before switching on the system.
🔧 Step 6: Start the System
Turn on the chlorinator and set the output level based on your pool size and usage.
👉 Monitor performance over the first few days and adjust if needed.
AFTER INSTALLATION (SETUP TIPS)
Once installed:
- Check chlorine levels regularly
- Adjust output based on usage
- Ensure proper pump run time
👉 Small adjustments early on lead to better long-term performance
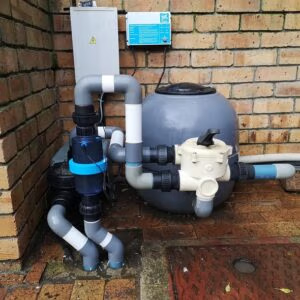
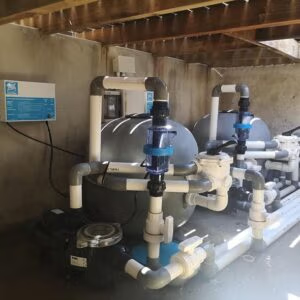
SALTLOGIC installation set-up examples
COMMON INSTALLATION MISTAKES
Avoid these:
❌ Installing before the filter
Leads to dirty water entering the system
❌ Incorrect system sizing
Results in low chlorine output
👉 (Link: what size chlorinator do I need)
❌ Poor electrical setup
Can damage the unit or cause safety issues
❌ Not dissolving salt fully
Can affect system performance
EXPERT INSIGHT
From our experience, most installation issues aren’t caused by the chlorinator—they come from:
👉 Incorrect placement
👉 Poor setup
👉 Skipping key steps
When installed correctly, a SALTLOGIC chlorinator is designed to run reliably with minimal intervention.
Additional resources to :
FREQUENT INSTALLATION QUESTIONS
Can I install a salt chlorinator myself?
Yes—many pool owners do. However, electrical connections should be handled by a qualified professional if you’re unsure.
How long does installation take?
Typically a few hours, depending on your setup.
Where should the chlorinator be installed?
After the pump and filter in the plumbing system.
How much salt do I need?
This depends on your pool size—refer to your specifications guide.
Need Help Installing Your SALTLOGIC Chlorinator?
Getting the installation right makes all the difference in performance and maintenance.
We can help you:
- Choose the correct setup
- Avoid common mistakes
- Optimize your system
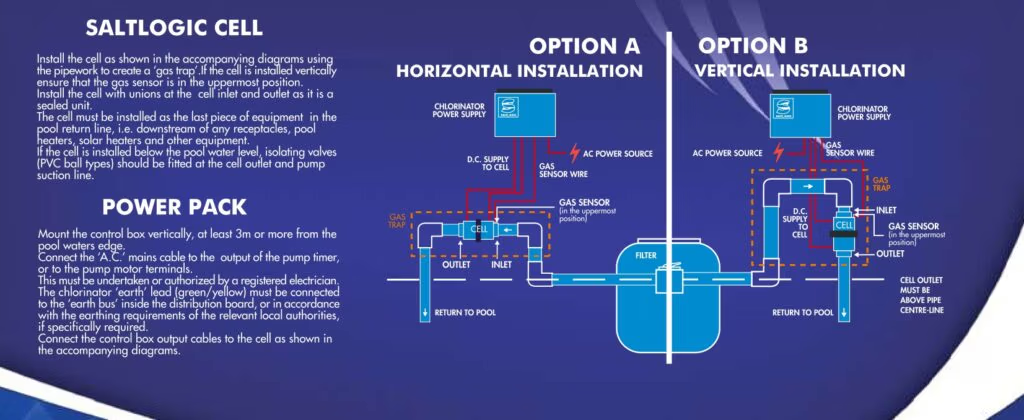
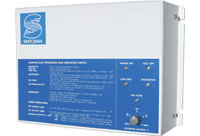
- Mount the chlorinator control box vertically, at least 3m or more from the swimming pool waters edge, preferably out of direct sunlight and out of the direct path of garden sprinklers.
- The salt chlorinator control box must be connected with the swimming pool circulation pump electrical source, so that the salt chlorinator cell can only operate when the swimming pool pump is on. This must be undertaken or authorised by a registered electrician.
- Failure to install the SALTLOGIC salt chlorinator control box as per the aforementioned paragraph may invalidate your warranty.
- The salt water chlorinator ‘earth’ lead (green/yellow) must be connected to the ‘earth bus’ inside the distribution board, or in accordance with the earthing requirements of the relevant local authorities, if specifically required.
- Connect the salt chlorinator control box output cables to the chlorinator cell as shown in the accompanying diagram.
- Install the salt chlorinator cell as shown in the accompanying diagrams using the pipework to create a ‘gas trap’.
- If the chlorinator cell is installed vertically ensure that the gas sensor is in the uppermost position.
- Install the salt chlorinator cell with unions at the chlorinator cell inlet and outlet as it is a sealed unit.
- The salt water chlorinator cell must be installed as the last piece of equipment in the swimming pool return line, i.e. downstream of any receptacles, swimming pool heaters, solar heaters and other equipment.
- If the salt chlorinator cell is installed below the swimming pool water level, isolating valves (PVC ball types) should be fitted at the chlorinator cell outlet and swimming pool pump suction line.
© 2026 Saltlogic. All Rights Reserved.